คำอธิบาย
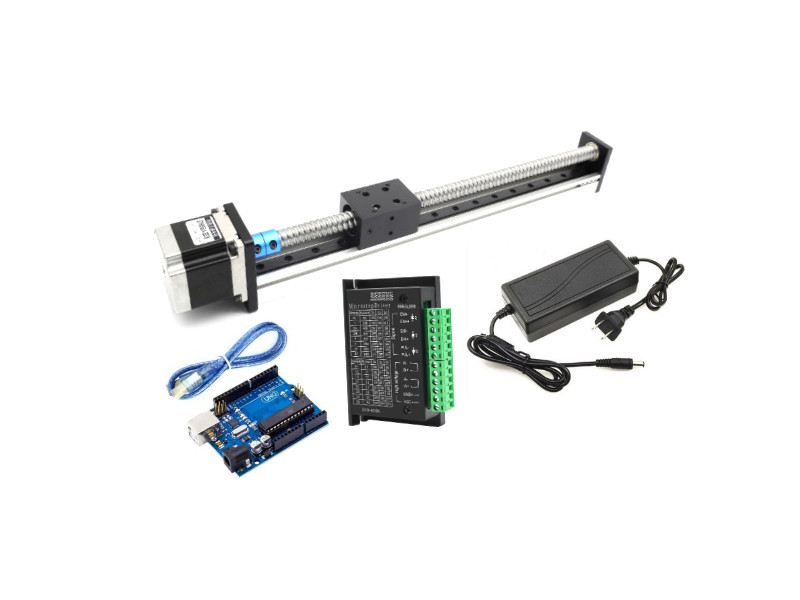
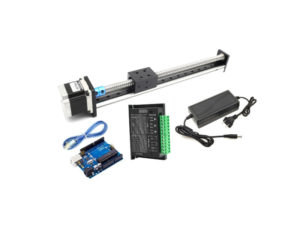
ชุดรางเลื่อนสไลด์บอลสกรู ประกอบสำเร็จพร้อมใช้งานมีตัวควบคุมเสียบไฟใช้ได้เลย
ลูกค้าสามารถแก้ไขโปรแกรมเพื่อปรับเปลี่ยนการเคลื่อนที่และความเร็วในแบบของตัวเองให้เหมาะสมกับงาน
รางเลื่อนพร้อมบอลสกรู มี Linear Guide ออกแบบมาเพื่อให้การเคลื่อนที่เชิงเส้นมีความแม่นยำสูง ค่าสัมประสิทธิ์แรงเสียดทานต่ำ ทำจากวัสดุโลหะผสมอลูมิเนียมคุณภาพสูง ทนต่อการสึกหรอ การใช้งานทนทาน. เหมาะสำหรับอุตสาหกรรมระบบอัตโนมัติ
ข้อมูลจำเพาะ Linear Guide Slide Ball Screw
- Stainless Lead Screw
- Lead Diameter 16mm
- Screw Pitch 5mm
- Screw Type Trapezoidal
- Effective Stroke 300mm
- Body Length ความยาวไม่รวมมอเตอร์ 410mm (300+110)
- Body Width 56mm
- Accuracy 0.3mm
- Max Speed 50mm/s
- Force Movement Linear Guide
- Aluminium Profile T-Nut M4 ด้านใน Slot สำหรับติดตั้งฐานร่วมกับ Aluminium Profile ขนาดอื่นๆ
- Support Stepper Motor BLDC Motor, Servo Motor, Nema17 (42mm), Nema23 (57mm)
- Load Capacity
- Horizontal load ≤ 10kg
- Vertical load ≤ 5kg
ในชุดประกอบด้วย
- 1pcs x LSS301 ชุดรางเลื่อนบอลสกรู Linear Guide Slide Ball Screw X1605
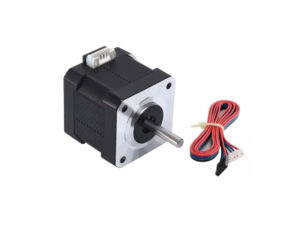
- 1pcs x MT23XX Stepper Motor NEMA23 1.2Nm
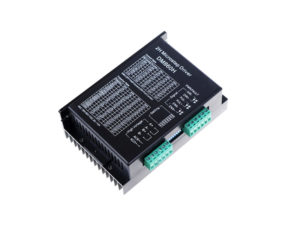
- 1pcs x DMST06 กล่อง Driver TB6600
- 1pcs x BDMC04 Arduino Uno R3 Compatible + USB Cable
- 1pcs x PX120X Power Adaptor DC12V/XA
- 1pcs x CB0003 สายไฟ Cable DC Jack 5.5×2.1mm-30cm-Female
- 1pcs x CB0004 สายไฟ Cable DC Jack 5.5×2.1mm-30cm-Male
Dimension Linear Slide Ball Screw
Wiring Diagram
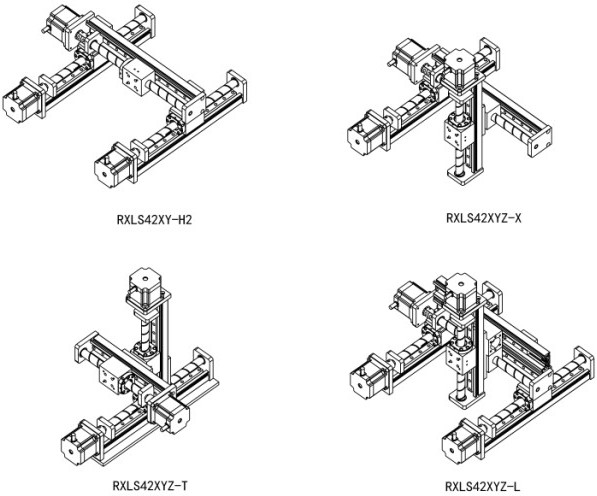
การประยุกต์ใช้งานตัวควบคุมหลายแกน
ตัวอย่างการสั่งงานด้วย Arduino Code สำหรับทดสอบการทำงานบอลสกรู
ตัวอย่างการควบคุม สเต็ปปิ้งมอเตอร์ขนาด 3 แอมป์ ด้วย Arduino + ไมโคร Step Driver TB6600 เบื้องต้น
Linear_Slide_LSSX05_TB6600
https://drive.google.com/drive/folders/1YALYYlV6PUrQz-IYNR843RhyF7twXqQ4?usp=sharing
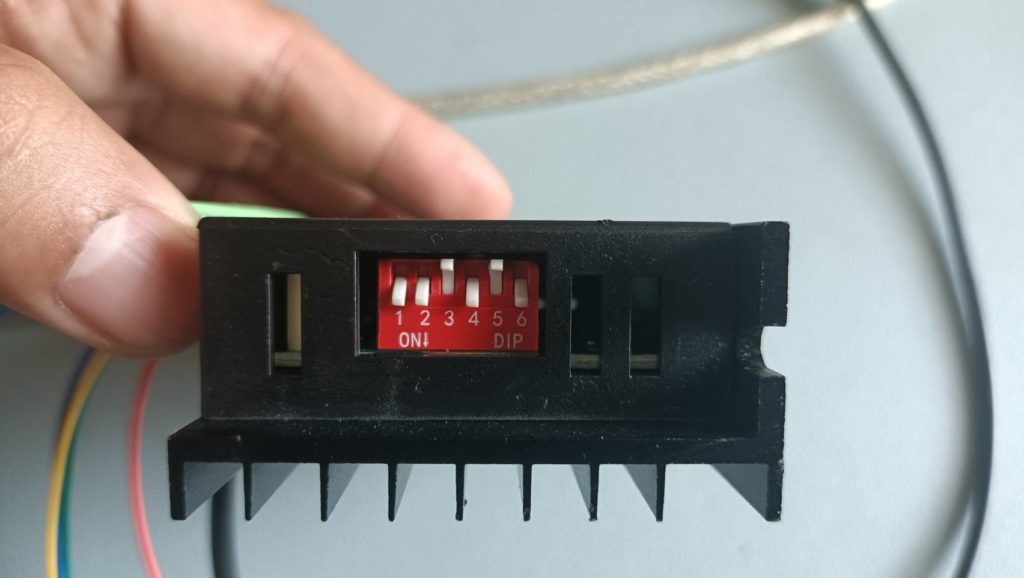
สเต็ปปิ้งมอเตอร์ขนาด 3 แอมป์ ปรับตั้ง ดิฟต์สวิตช์ของไมโคร Step Driver TB6600 ดังนี้
- DIP Switch S1 S2 S3 ตั้งเป็น On Off On
- DIP Switch S4 S5 S6 ตั้งเป็น On Off On
1 2 3 4 5 6 7 8 9 10 11 12 13 14 15 16 17 18 19 20 21 22 23 24 25 |
#include <AccelStepper.h> // The X Stepper pins #define PUL_PIN 2 // PUL_PIN #define DIR_PIN 3 // DIR_PIN AccelStepper stepper(AccelStepper::DRIVER, PUL_PIN, DIR_PIN); void setup() { stepper.setMaxSpeed(3500.0); // ปรับความเร็ว หน่วยเป็น พัลส์ต่อวินาที steps per second stepper.setAcceleration(5500.0); // ปรับความเร่ง หน่วยเป็น พัลส์ต่อวินาทีกำลังสอง steps per second per second stepper.setCurrentPosition(0); //เซตค่าตำแหน่งเริ่มเท่ากับ 0 ก่อนเข้าลูป } void loop() { stepper.runToNewPosition(0); //เริ่มต้นที่ตำแหน่ง 0 delay(500); stepper.runToNewPosition(1500); // ระยะการเคลื่อนที่ไปทางบวก ด้านขวา จำนวน พัลส์ delay(500); stepper.runToNewPosition(0); delay(500); stepper.runToNewPosition(-1500); // ระยะการเคลื่อนที่กลับ ทางลบ ด้านซ้าย จำนวน พัลส์ delay(500); } |
ตัวอย่างการควบคุม สเต็ปปิ้งมอเตอร์ขนาด 3 แอมป์ ด้วย Arduino + ไมโคร Step Driver TB6600 เบื้องต้น
ตัวอย่างโปรแกรมควบคุมรางสไลด์ แบบไป-กลับ ตามตำแหน่งที่กำหนด
ซอร์สโค้ดเพื่อควบคุมการทำงาน ได้ตามวีดิโอด้านบน
1 2 3 4 5 6 7 8 9 10 11 12 13 14 15 16 17 18 19 20 21 22 23 24 25 26 27 28 29 30 31 32 33 34 35 36 37 38 39 40 41 42 43 44 45 46 47 48 49 50 51 52 53 54 55 56 57 58 59 60 61 62 63 64 65 66 67 68 69 70 71 72 73 74 75 76 77 78 79 80 81 82 83 84 85 86 87 88 89 90 91 92 93 94 95 96 97 98 99 100 101 102 103 104 105 106 107 108 109 110 111 |
#include <AccelStepper.h> //12V full step 200 pulse/rev, 1.5A // S1 S2 S3 S4 S5 S6 // NO NO OFF NO OFF NO // The X Stepper pins #define STEPPER1_DIR_PIN 3 #define STEPPER1_STEP_PIN 2 AccelStepper stepper1(AccelStepper::DRIVER, STEPPER1_STEP_PIN, STEPPER1_DIR_PIN); int MaxAcc = 10000; int MaxSpd = 800; int State = 0; int Step = 0; void setup() { stepper1.setMaxSpeed(MaxSpd); stepper1.setAcceleration(MaxAcc); stepper1.setCurrentPosition(0); stepper1.moveTo(1000); Serial.begin(9600); delay(2000); Serial.println("Power ON "); Serial.print("State = "); Serial.print(State); Serial.print("\t position = "); Serial.println(stepper1.currentPosition()); delay(2000); } void loop() { //Serial.println(stepper1.currentPosition()); switch (State) { case 0: // if (stepper1.distanceToGo() == 0) { State =1; Serial.print("State = "); Serial.print(State); Serial.print("\t position = "); Serial.println(stepper1.currentPosition()); delay(1000); stepper1.moveTo(0); } break; case 1: // your hand is close to the sensor if (stepper1.distanceToGo() == 0) { State = 2; Serial.print("State = "); Serial.print(State); Serial.print("\t position = "); Serial.println(stepper1.currentPosition()); delay(1000); stepper1.moveTo(2500); } break; case 2: // your hand is a few inches from the sensor if (stepper1.distanceToGo() == 0) { State=3; Serial.print("State = "); Serial.print(State); Serial.print("\t position = "); Serial.println(stepper1.currentPosition()); delay(1000); stepper1.moveTo(0); } break; case 3: // your hand is nowhere near the sensor if (stepper1.distanceToGo() == 0) { State = 4; Serial.print("State = "); Serial.print(State); Serial.print("\t position = "); Serial.println(stepper1.currentPosition()); delay(1000); stepper1.moveTo(-1000); } break; case 4: // your hand is nowhere near the sensor if (stepper1.distanceToGo() == 0) { State = 5; Serial.print("State = "); Serial.print(State); Serial.print("\t position = "); Serial.println(stepper1.currentPosition()); delay(1000); stepper1.moveTo(0); } break; case 5: // your hand is nowhere near the sensor if (stepper1.distanceToGo() == 0) { State = 0; Serial.print("State = "); Serial.print(State); Serial.print("\t position = "); Serial.println(stepper1.currentPosition()); delay(1000); stepper1.moveTo(-2000); } break; } stepper1.run(); } |
เอาต์พุตแสดงตำแหน่ง ที่เคลื่อนที่ไป โดยจะทำงานวนไปตั้งแต่ state ที่ 0 ถึง State 5
การต่อสายสัญญาณ ระหว่างบอร์ดอาดูโน่ และ ไดร์ฟเวอร์ สเต็ปเปอร์มอเตอร์
การตั้งค่าตัวไดร์ฟเวอร์ ขับสเต็ปเปอร์ ความละเอียด 200 สเต็ปต่อรอบ ตั้งค่ากระแส1.0 แอมป์
รีวิว
ยังไม่มีบทวิจารณ์