

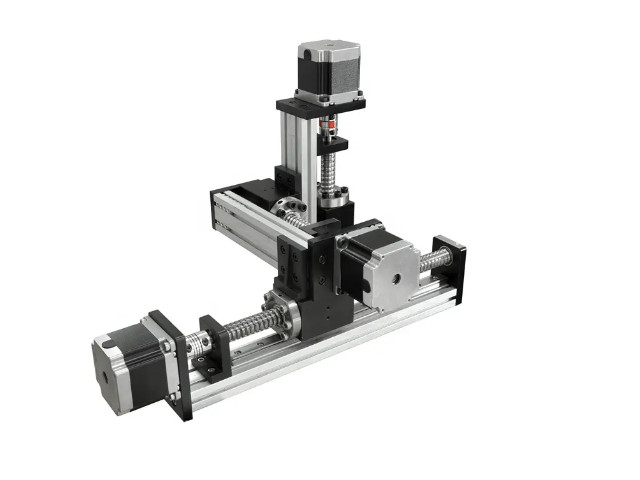
รางบอลสกรู 2-axis 3-axis XY / XYZ /XZ สำหรับระบบอัตโนมัติ หุ่นยนต์อุตสาหกรรม แขนหุ่นยนต์คาร์ทีเซียนหลายแกน เคลื่อนที่เชิงเส้น รางนำบอลสกรู Stroke ขนาด 50 – 1000mm. ใช้ระบบขับเคลื่อน สเต็ปเปอร์มอเตอร์ / ไดร์เวอร์ / คอนโทรลเลอร์ / ลิมิตสวิตช์ ขอบเขตการใช้งาน เครื่องพิมพ์ 3 มิติ สายการผลิตอัตโนมัติ เครื่องตรวจจับพลาสมา, แขนหุ่นยนต์
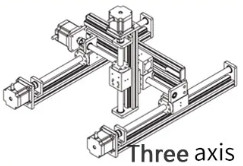
โครงตั้ง 3 แกน XYZ Gantxry
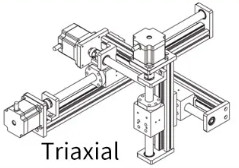
คานยื่น 3 แกน XYZ Cantilever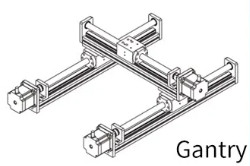
โครงตั้ง 2 แกน 2XY Gantxry
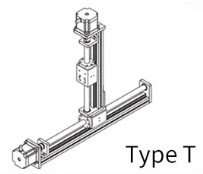
ตัวที 2 แกน XZ Type T
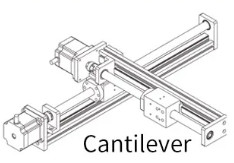
คานยื่น 2 แกน XY Cantilever
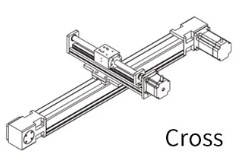
ข้าม 2 แกน XY Cross
1. Turn on the robot arm and plug the USB cable into the robot arm.
2. Open WLKATA Studio, enter Settings , select Mirobot and click Update Firmware .
1. Turn on the robot arm and plug the USB cable into the robot arm.
2. Find the “updatehex” folder in the root directory of “WlkataStudio”. As shown in Figure 17-5.
3. After opening “updatehex”, find “XLoader” and open it. As shown in Figure 17-6.
4. Open ” XLoader ” and select the latest robot arm firmware downloaded . As shown in Figure 17-7.
5. After selecting the arm firmware , click the ” Upload ” option. As shown in Figure 17-8.
1. Turn on the robotic arm and plug the USB cable into the multi-function controller .
2. Find the “controlbox” folder in the root directory of “WlkataStudio”. As shown in Figure 17-10.
3. Open the folder “controlbox”, find and open the folder “bin file”. As shown in Figure 17-11
4. Double-click to open the folder “binfile”, as shown in Figure 17-12(1). Then put the firmware you just downloaded into it, delete the old version of the firmware, and only keep the latest firmware. As shown in Figure 17-12(2).
5. Open WLKATA Studio, enter the settings , click update firmware behind the multi-function controller firmware .
1.. Turn on the robotic arm and plug the USB cable into the multi-function controller .
2. Install “flash_download_tool_3.8.8” and open the software.
3. After opening the software, a window will pop up, as shown in Figure 17-15.
Select ” ESP32 ” in the “Chip Type” column , as shown in Figure 17-16(1)
Select ” factory ” in the “Work Mode” column , as shown in Figure 17-16(2).
Click ” ok ” to go to the next step
4. The page is now locked and needs to be manually unlocked. Uncheck ” LOCK SETTINGS “. As shown in Figure 17-17.
The red box is the multi-function controller firmware (c-), and the blue box is the Bluetooth teach pendant firmware (t-). Here we don’t consider the teach pendant, only choose the controller. The address below is 0x00 by default .
Select the downloaded latest multi-function controller firmware to load
Select the robot port , and select 921600 as the baud rate . Figure 17-19
Then click the ” Start ” button. Figure 17-20
| No. | Target knowledge points | Theory | Practice | Estimated hours of learning |
|---|---|---|---|---|
| 1 | Quick unpacking | 1 Drag teaching | 1. The accessories for myCobot 2. drive the robot to perform drag teaching |
1 hour |
| 2 | Background knowledge learning | 1. Use background of industrial robots; 2. coordinate and space learning, and Cartesian 3D coordinate and rotation, xyz; 3. joint and coordinate control of industrial robots |
1. Joint control and recurrence of robot joints 2. speed control of robots 3. control and cycle of robot coordinate points |
5 hours |
| 3 | Hardware learning | 1. Principles and operations of embedded electronics 2. the principle and knowledge of servo and motor 3. actuator learning |
1. Basic/atom control and driving 2. driving and motion of servo 3. robot accessory learning |
5 hours |
| 4 | Software and firmware and their updating | 1. Identify different software platforms and their use 2. firmware loading and adaptation principle |
1. Select the developing platform suitable for you 2. load and update the corresponding firmware. |
2 hours |
| 5 | Building of software development environment | 1. Build Arduino platform 2. load and update of Arduino library file 3. understand serial communication |
1. Familiar with Arduino platform 2. load a library 3. operate and run the first line of codes |
2 hours |
| 6 | Learning and development of robot library | 1. Basic communication and operation types of robots 2. common operating methods of robots 3. control of direction and coordinate modes |
1. Communicate with the robot 2. control the robot to move 3. operate the IO interface, gripper, etc. of the robot; |
5 hours |
| 7 | myBlockly operation robot arm | 1. Understand the basic architecture and relation of graphical programing language interfaces: sensor, actuator and procedure 2. variable, cycle and judgment 3. control method of robot arm |
1. Display different fonts in the basic 2. make the robot arm move to different positions using three buttons of the basic 3. control the robot arm to make it move to several positions circularly |
10 hours |
| 8 | The use of roboFlow | 1. Learn the industrial operating systems commonly used for robots 2. learn the common modules for roboFlow: point, quick movement, IO control and output 3. learn the advanced modules of roboFlow: cycle, judgment, and pallet program |
1. Control the movement of the robot arm 2. basic control of IO input and output 3. cycle control and judgmen |
5 hours |
| 9 | Algorithms related to image recognition | 1. Common color recognition methods and strategies 2. common shape recognition methods and strategies 3. common area recognition methods and strategies |
1. Building of a ROS environment 2. reading of different colors 3. recognition of different shapes |
20 hours |
| 10 | Vision and the joint debugging of the robot | 1. Connect the world with a camera coordinate system 2. QR code image calibration 3. movement and correction |
1. Operate the robot arm to the camera coordinate system 2. the robot arm moves in the camera coordinate system 3. recalibrate and set |
10 hours |
| 11 | Artificial intelligence (AI) package | 1. Flow chart learning and making 2. electrical connection diagram learning and making 3. operation strategies such as image recognition and classification, etc |
1. Sensor connection 2. gripper actuator connection and driving 3. robot arm driving and visual joint debugging |
20 hours |
Docs