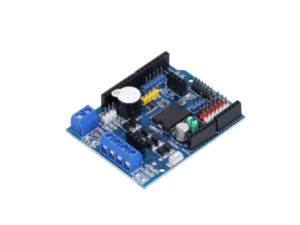
BDSP08 บอร์ดโมดูลควบคุมความเร็วมอเตอร์ PWM DC Motor Driver Speed Control L298P Arduino Uno Shield Blue
฿320.00
สั่งจองสินค้าได้
คำอธิบาย
บอร์ด Shield ใช้งานร่วมกับ Arduino UNO รองรับ PWM control ควบคุมความเร็วมอเตอร์ ได้โดย Pin D10, D11, D12, D13 ของ Arduino UNO
- Voltage in DC6.5 – 12V
- Voltage Motor DC4.8 – 24V
- Drive working current Io ≤ 2A
- Maximum power dissipation 25W
- High level DC 2.3V ≤ Vin ≤ 5V
- Low level DC 0.3 V ≤ Vin ≤ 15V
Arduino Uno ในส่วนของฝั่ง Digital ใช้ควบคุม L298P Motor Shield
- Digital 10 PWM ควบคุมความเร็วมอเตอร์ A
- Digital 11 PWM ควบคุมความเร็วมอเตอร์ B
- Digital 12 Logic ควบคุมทิศทาง มอเตอร์ A
- Digital 13 Logic ควบคุมทิศทาง มอเตอร์ B
โดยปกติเราจะควบคุมทิศทาง Direction control โดยการป้อน Logic ที่ In1, In2 ของ L298 ให้มี Logic ที่ต่างกันซึ่งก็จะใช้ Digital Pin ของ Arduino Uno ถึง 2 Pin เราสามารถลด Pin ให้เหลือ 1 Pin โดยการต่อ 74HC04 Invert เพื่อกลับ Logic ให้ In1, In2 ของ L298 นอกจากนั้นเรายังสามารถสร้างเสียงเตือนด้วย Buzzer บนบอร์ด L298P Motor Shield โดยสั่ง (Digital Pin D4)
Download โค้ดตัวอย่างการใช้ L298P Motor Shield ควบคุมความเร็วแบบ PWM Arduino Uno + Potentiometer ตัวต้านทานปรับค่าได้ VR 10KB



รีวิว
ยังไม่มีบทวิจารณ์