คำอธิบาย
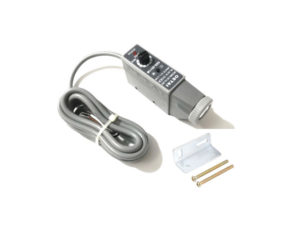
Color mark Sensor เซนเซอร์สี แสงสีขาว Color mark Sensor ใช้สำหรับการตรวจจับวัตถุ ผลิตภัณฑ์ในงานอุตสาหกรรม สามารถใช้กับบรรจุภัณฑ์ เช่น ถุงกระดาษ, ฟิล์มใส, ฟิล์มอลูมิเนียม
- White Color mark sensor bag making machine packaging machine photoelectric eye
ข้อมูลเทคนิค
- Light source Color Mark White LED แสงสีขาว
- แรงดันใช้งาน DC10 – 30V ± 10%
- สัญญาณเอาต์พุต (Output Type) Output NPN
- สัญญาณสวิตช์แบบ Light ON / Dark ON selectable พร้อมป้องกันลัดวงจร
- ไฟแสดงสถานะ (Indicator) LED สีแดง แสดงสถานะทำงาน
- ระยะการตรวจจับ Detection Distance 10mm ±3 mm
- Emission Diameter 1 mm
- Detection Method Coaxial Reflection
- Response time 0.1 – 1ms
- Load current < 100mA
- Load current < 100mA
- Resistant to ambient light Incandescent lamp 3000 Lux Sunlight 10000 Lux
- Protection grade IP67 (moisture-proof and dust-proof)
- Bright Pass/Dark Pass สลับ Conversion Dual Output, ป้องกันการลัดวงจร Reverse polarity protection
- Cable PVC length 2 Meters
สายต่อใช้งาน Wiring Diagram
- สายสีน้ำตาล Brown ไฟเลี้ยง +V (DC 12–30 V)
- สายสีดำ Black กราวด์ GND 0 V
- สายสีขาว White OUTPUT NPN NO
- –
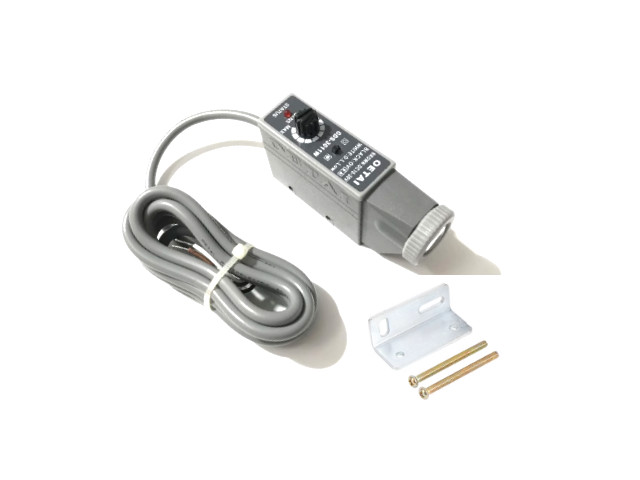
ในชุดประกอบด้วย
- 1pcs x เซนเซอร์ตรวจจับสี Color Sensors
- 1pcs x ฉากติดตั้ง Sensor Bracket
- 1set x สกรู Screw
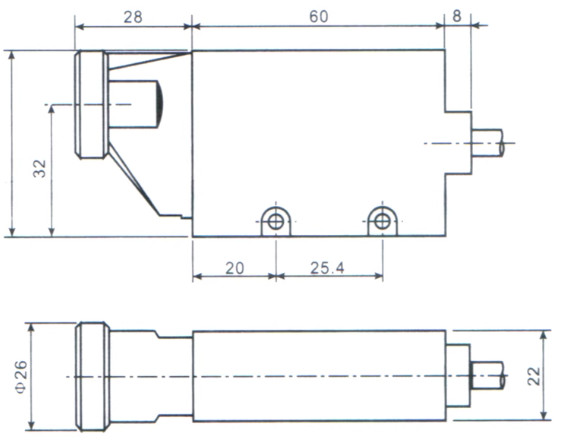
Dimensions
- ขนาด (Dimensions) 90 (L) × 45 (H) × 22 (W) mm
Model selection
Single light source selection
“GDS-3011R” red light source
“GDS-3011G” green light source
“GDS-3011B” blue light source
“GDS-3011W” white light source
Pair light source selection
“WB” white and blue light source.
Photoelectric Mark Sensor (GDS-C21 / GDS-3011) – Setup & Sensitivity Tuning
Pre-setup
- Light source (LED color): Choose per the packaging color code you ordered: G = Green, R = Red, W = White, B = Blue.
- Output mode: Set Light-ON or Dark-ON to match your PLC logic.
- Mounting & distance: Keep the head perpendicular to the web. Sensing gap = 10 ± 2 mm.
- Spot vs. mark size: Beam ≈ 1–1.5 mm. Make sure the printed mark is wider than the spot.
- Example used below: Mark = light color; background = dark. (Invert Point (1) and (2) targets if your job is opposite.)
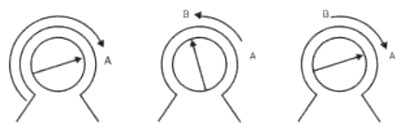
Adjusting Sensitivity (Three-point method)
Knob = sensitivity potentiometer. You will establish Point A and Point B, then set midway.
(1) Set Point A – Background
- Move web so the spot is on the dark background (outside the mark).
- Rotate the sensitivity counter-direction to MIN (bottom).
- Then turn clockwise slowly until the OUT1 indicator just turns ON.
- Mark this knob position as Point A.
(2) Set Point B – Mark center
- Move the web so the spot is in the middle of the light mark.
- Turn the knob slowly counter-clockwise until OUT1 just turns OFF (or “just right” threshold).
- Mark this knob position as Point B.
(3) Final set – Midpoint
- Rotate the knob to the midpoint between A and B.
- At this midpoint, OUT2 should be ON (per the indicator logic).
- Done. A–B distance large = stronger color contrast = more stable detection. If A and B are almost the same, your contrast is weak—see tips.
Pass/Fail & Tips
-
Stable: OUT toggles cleanly when crossing mark edges at line speed; no chatter.
If unstable / narrow A–B:
- Reduce ambient light; shield the head.
- Re-focus distance to 10 mm; keep perpendicular.
- Try a different LED color (e.g., Green for red/brown marks, Blue for yellow, White for general).
- Use a glossier / matte background to increase contrast, or increase mark width.
- Slow web speed during tuning, then re-check at production speed.
วิธีตั้งค่าตัวตรวจจับมาร์ค (GDS-C21 / GDS-3011)
ก่อนเริ่ม
- เลือกแหล่งกำเนิดแสง: ตามโค้ดบนกล่อง G=เขียว, R=แดง, W=ขาว, B=น้ำเงิน
- โหมดเอาต์พุต: ตั้ง Light-ON หรือ Dark-ON ตามลอจิกของเครื่อง/PLC
- การติดตั้ง: หน้าหัวตั้งฉากกับชิ้นงาน ระยะ 10 ± 2 มม.
- ขนาดลำแสง: ประมาณ 1–1.5 มม. ให้มาร์คกว้างกว่าลำแสง
- ตัวอย่างด้านล่าง: มาร์คสีอ่อน / พื้นหลังสีเข้ม (ถ้าโจทย์กลับกัน ให้สลับเป้าหมายของขั้นตอน (1) และ (2))
ปรับความไว (3 ขั้น)
(1) จุด A – พื้นหลัง
เลื่อนให้ลำแสงตกบน พื้นหลังสีเข้ม → หมุนปุ่มไปที่ ต่ำสุด → ค่อยๆ หมุน ตามเข็ม จน OUT1 ติดพอดี → จดตำแหน่งเป็นจุด A
(2) จุด B – กึ่งกลางมาร์ค
เลื่อนให้ลำแสงตกบน กึ่งกลางมาร์คสีอ่อน → ค่อยๆ หมุน ทวนเข็ม จน OUT1 ดับพอดี → จดตำแหน่งเป็นจุด B
(3) ตั้งค่าจริง
หมุนปุ่มไปที่ กึ่งกลางระหว่างจุด A และ B → OUT2 ควรติด → เสร็จสิ้น
ระยะ A–B กว้าง = คอนทราสต์สูง = การตรวจเสถียร หาก A–B แคบ ให้ดูคำแนะนำด้านล่าง
เกณฑ์ผ่าน/ไม่ผ่าน & เคล็ดลับ
-
สัญญาณต้อง สลับชัด เมื่อผ่านขอบมาร์ค ไม่มีอาการเด้ง
หากยังไม่นิ่ง / A–B แคบ:
- บังแสงรบกวน ปรับสภาพแสงภายนอก
- ปรับระยะให้ ใกล้ 10 มม. และตั้งหัวให้ ฉาก
- ลอง สีไฟ LED อื่น (เช่น เขียวกับมาร์คโทนแดง/น้ำตาล, น้ำเงินกับโทนเหลือง, ขาวใช้ทั่วไป)
- เพิ่มคอนทราสต์พื้นผิว หรือทำมาร์คให้กว้างขึ้น
- ปรับความเร็วสายพานให้ช้าเพื่อจูน แล้วทดสอบที่ความเร็วจริงอีกครั้ง
รีวิว
ยังไม่มีบทวิจารณ์